In this article of Spring Boot tutorial, we will learn to Dockerizing Spring Boot Application. We will create a Docker image of a Spring Boot App using Maven and run the spring boot app from within the docker image.
1. Create a Spring Boot app with Spring Initaializr
Let’s create a simple Spring Boot Application with a REST controller. We can use Spring initializr and setting a version of Spring Boot and adding “Web dependencies”. After this, let’s generate the Spring Boot application as a Maven project. Let’s call our app “sample-docker”. Let’s create a REST controller having a name as a path variable that is got from the user and respond with a string to welcome the user to a website:
@RestController
public class Controller {
@Getmapping(“/welcome/{name}”)
 public String welcome(@PathVariable String name) {
  return “Hello, “+name + “!  Welcome to the website! ”;
 }
}
Run the application from the project root folder using the below Maven command:
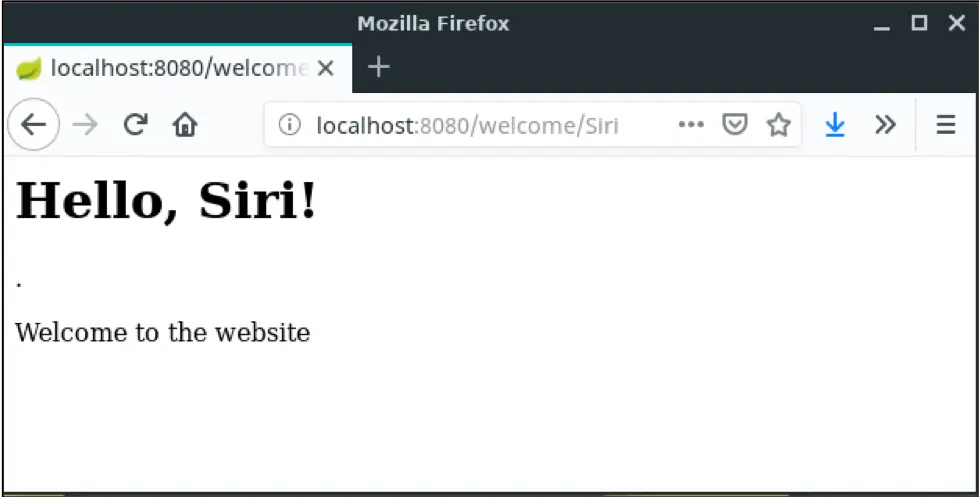
$ mvn spring-boot:runAlternately, we can import the project into STS and choose “Run As” → “Spring Boot App” to locally run the application. As expected, the app will run on port 8080. Let’s check the endpoint by entering a user’s name, say “Siri” i.e. “http://localhost:8080/welcome/Siri”. The response to this, looks like:
2. Dockerizing Spring Boot Application
Now we have created a Spring Boot application, the next step is to dockerize it. To install Docker, follow the official Docker install guide. We will build the image using a Dockerfile. Making a Docker image of an application makes deployment and scaling the application easily in house and cloud deployments.
2.1 Build an Image using Dockerfile
Docker builds images by reading the instructions specified in the Dockerfile. This Dockerfile is a text file that has the commands to build an image. By using docker build, we can create an automated build that executes the commands in Dockerfile. The format of the Dockerfile looks like:
#comment
INSTRUCTION arguments
Though instruction is not case-sensitive, it is a normal convention to use uppercase for instructions to distinguish them from the arguments, improving readability. In our example, Dockerfile might look like:
FROM java:8-jdk-alpine
COPY ./target/sample-docker-0.0.1-SNAPSHOT.jar /usr/app/
WORKDIR /usr/app
ENTRYPOINT [“java”,”-jar”,”sample-docker-0.0.1-SNAPSHOT.jar”]
Below is a description of the commands in the Dockerfile.
A Dockerfile must start with a ‘FROM’ instruction. We use this keyword to instruct Docker to use the Base image from which we are building. This is followed by 1 or more arguments to declare the arguments that are used in the Dockerfile. We can create docker image from scratch or use existing images available in docker-hub. In our example, we use the image ‘java’ with tag ‘8-jdk-alpine’. This image is Java-enabled alpine Linux image and the main advantage of using alpine based image is to enhance security of the container and to reduce the container size. The version of the JDK is 8.
- COPY – This instructs Docker to copy new filer or directories from <src> and copies them to the filesystem of the container at the path <dest>. In our example, we copy .jar file to build the Linux image inside
/usr/app. - WORKDIR – This instructs the Docker to set the working directory for RUN, CMD, ENTRYPOINT, COPY, ADD instructions specified in the Dockerfile. In our example, we had set the workdir to
/usr/app. Hence, we need not have to write the full path again and again. - RUN – Instructs Docker to execute a shell command-line in the target system.
- ENTRYPOINT – This instructs Docker to configure a container that will run as an exe file, by specifying how to run the application. In our example, we run our spring-boot-app as a
java–jar <app-name>.jar.
2.2 Build the Image
To create the Docker image, we need .jar file. To generate the jar file, run:
$ mvn clean installAlternately from within STS choose “Run As” → “maven install”. If the build succeeds, it will place a jar file named “sample-docker-0.0.1-SNAPSHOT.jar” in the target/ sub-folder within the project folder. After we build the jar file, we can build the docker image using docker build. To do this, we run the below command from the directory containing the Dockerfile:
$ docker build -t sample-appHere, -t flag specifies the name of the docker image and `.` specifies that location (current directory) of the Dockerfile. The built image stored in the local docker registry and tagged with the name `sample-app`. Below is a screenshot of the build process:

We can use the below command to check if the image is present:
$ docker images
We can run docker images using the docker run command. As we know, it isolates each container and has an environment we have to map the port of the host OS - 8090 and the port inside the container - 8080, specified as -p 8090:8080 argument to run our application.
$ docker run –rm -it -p 8080:8080 sample-app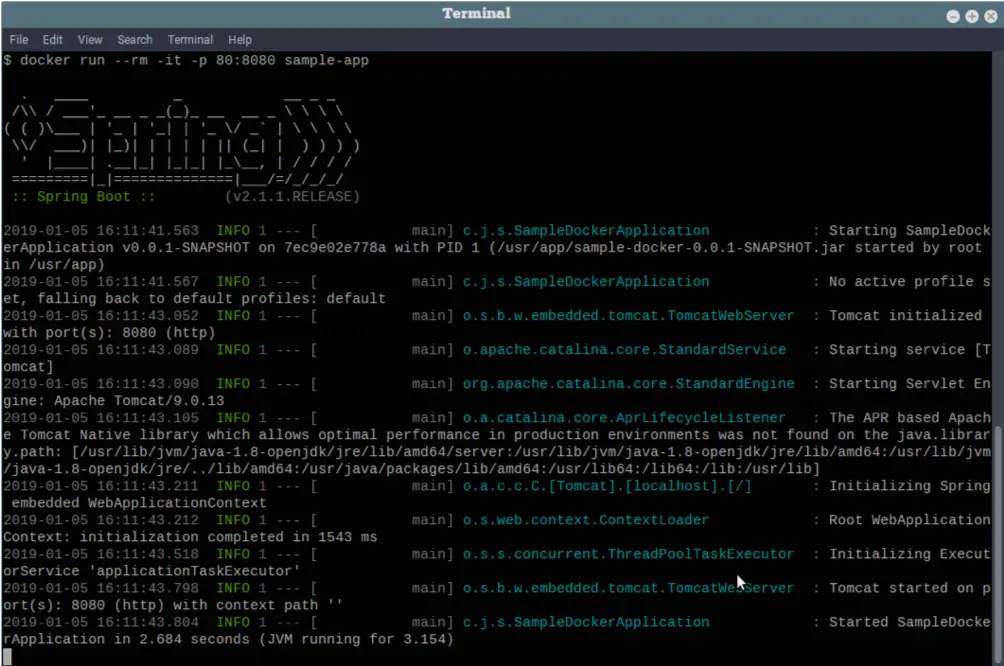
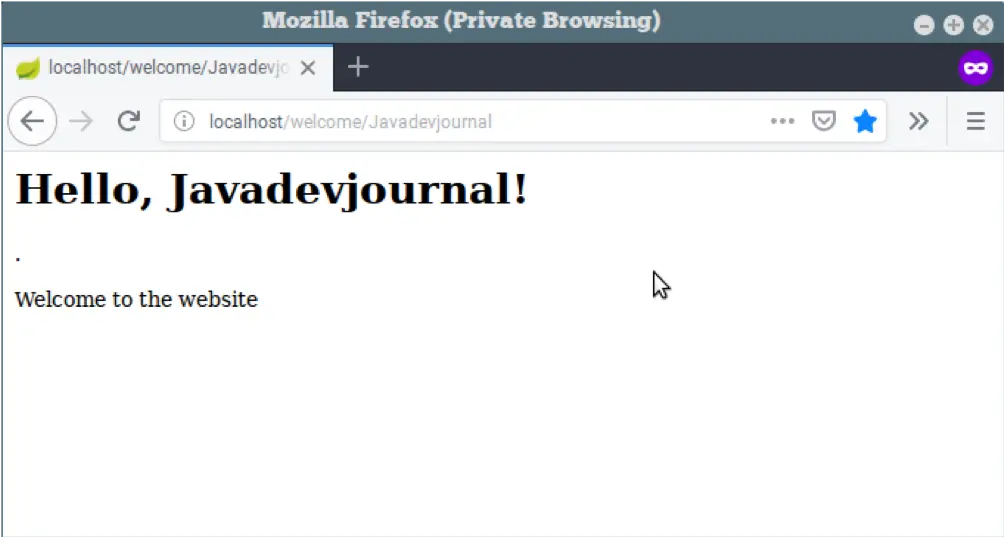
To check if our Spring Boot app is running with a Docker container, check the endpoint on: http://localhost/welcome/Javadevjournal!
Thus, we built our Docker image using Dockerfile, successfully.
2.2 Dockerizing the Spring-boot App using Maven
We understood how to write a simple Dockerfile and how to build our application using the docker build command. However, some issues may be encountered in our projects using the native build method: First, while creating a Docker file, we need to provide the version along with the jar name. The version keeps updating as the application evolves and an overhead of updating this in the Docker file arises. This is one problem that arises with the earlier method.
Another overhead in the previous approach is that, to run Docker commands, we need to run it in a terminal and need to do it manually. This overhead can be avoided if the Dockerfile is created internally as a part of the Maven life-cycle, allowing us to build images as a part of our integration. There are several Maven plugins readily available that we can configure in our pom.xml to create the Dockerfile internally. Then, we build the image based on the Dockerfile generated. So, we avoid the overhead of manually running the build commands in the terminal.
Let’s consider the plugin named fabric8io/docker-maven-plugin and try to use in our app. Visit this page for a few alternatives are in active development and a comparison between them. We should include this plugin in our pom.xml file after the build tag. Our pom.xml looks like:
<profiles>
    <profile>
        <activation>
            <property>
                <name>docker</name>
            </property>
        </activation>
        <build>
            <plugins>
                <plugin>
                    <groupId>io.fabric8</groupId>
                    <artifactId>docker-maven-plugin</artifactId>
                    <version>0.26.0</version>
                    <extensions>true</extensions>
                    <configuration>
                        <verbose>true</verbose>
                        <images>
                            <image>
                                <name>${project.artifactId}</name>
                                <build>
                                    <from>java:8-jdk-alpine</from>
                                    <entryPoint>
                                        <exec>
                                            <args>java</args>
                                            <args>-jar</args>
                                            <args>/maven/${project.artifactId}-${project.version}.jar</args>
                                        </exec>
                                    </entryPoint>
                                    <assembly>
                                        <descriptorRef>artifact</descriptorRef>
                                    </assembly>
                                </build>
                            </image>
                        </images>
                    </configuration>
                    <executions>
                        <execution>
                            <id>build</id>
                            <phase>post-integration-test</phase>
                            <goals>
                                <goal>build</goal>
                            </goals>
                        </execution>
                    </executions>
                </plugin>
            </plugins>
        </build>
    </profile>
</profiles>
Let’s inspect this. We have names our profile as ‘docker’. To build the image using Maven, we should run the command with -Ddocker. Now let’s build the image
$ mvn clean install -Ddocker
Note: To build an image with Maven, we use -Ddocker. To check the image that was just generated, we use
$ docker images
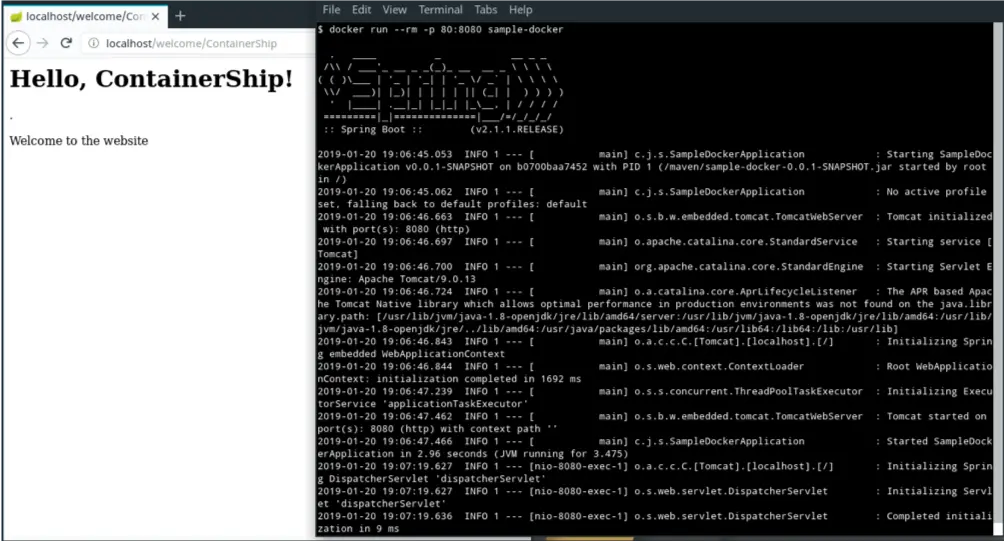
To run the image, we use $ docker run -p 80:8080 sample-docker. Now, we check the REST endpoint (http://localhost:80/welcome/Siri) in the browser
Note: We must ensure to stop the previously running containers that are using port 80 to avoid errors. We use the following command to know the containers that are running. $ docker ps. If the port is already in use, we can remove the old container using $ docker rm -f. Another way is to stop all the containers: $ docker rm -f $(docker ps -a -q)
Summary
In this article, we will learn to Dockerizing Spring Boot Application. We saw how to dockerize our Spring Boot application using the two commonly used approaches using a docker file and the other using a Maven plugin to build the Docker image.