In this quick post, we will learn about building a Spring Boot application using IntelliJ. The main purpose of this post is to help anyone new to Spring Boot get rolling quickly writing Spring applications with Spring Boot in IntelliJ. If you are a beginner with Spring Boot, I highly recommend starting with our Spring Boot.
Introduction
IntelliJ IDEA is the most popular Java IDE. IntelliJ IDEA provides first-class support to create and run Spring Boot based applications. We can create and configure Spring Boot application in the following ways.
- Import Spring Boot project in IntelliJ IDEA.
- Use built-in support for Spring Initializr in the IntelliJ IDEA editor.
We are using the built-in support of the IDE to create our Spring Boot application.
[pullquote align=”normal”]Spring Boot is available in the Ultimate edition only. [/pullquote]
1. Create Spring Boot Project With IntelliJ
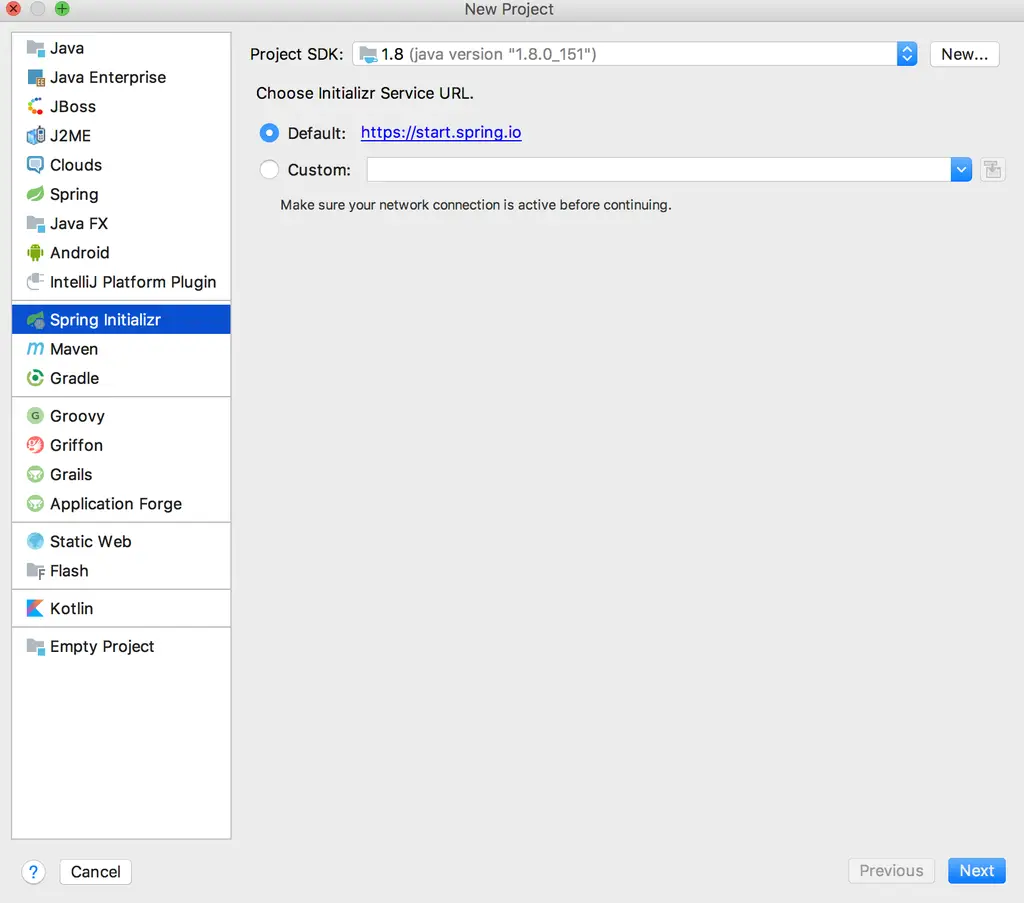
To start, the process, open IntelliJ IDEA and click on the new project option.

2. Select Spring Initializr from the project type on the left side panel. Select the correct JDK from the Project SDK drop-down (Spring Boot 2.x require a minimum JDK 8).
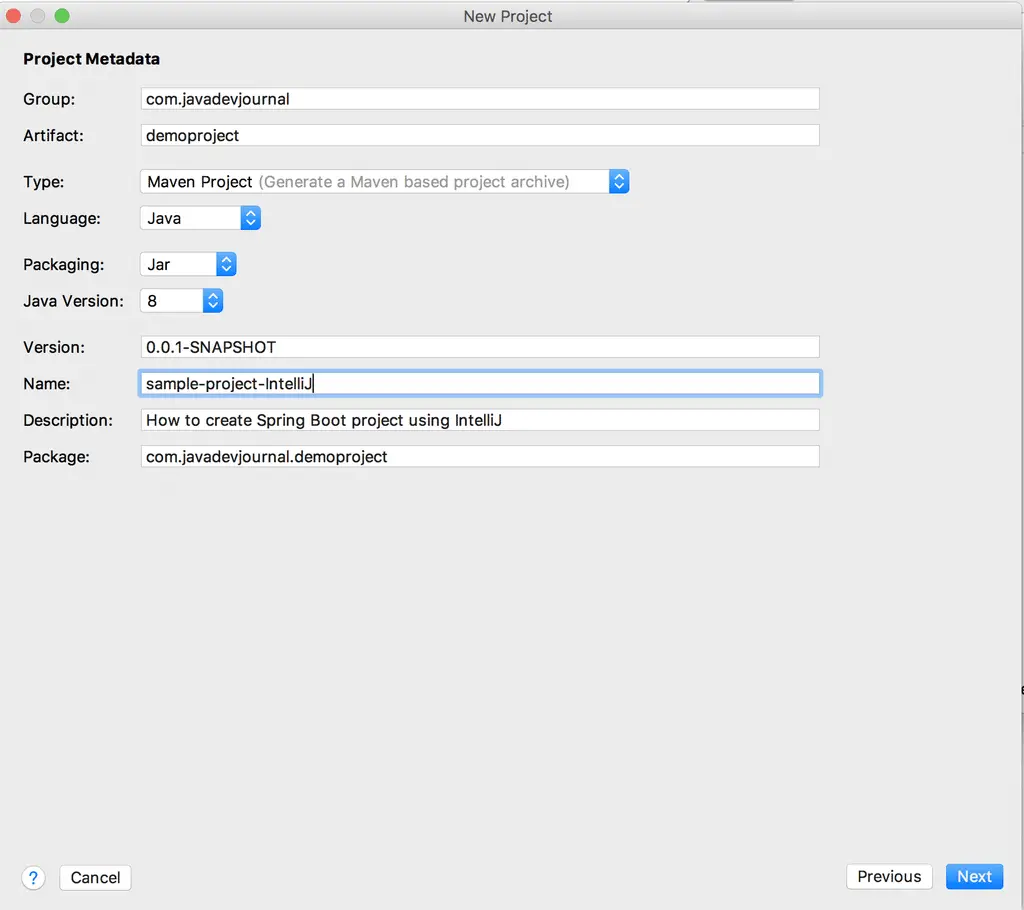
3. Enter the Maven project properties as per your project requirements and click on the next step.
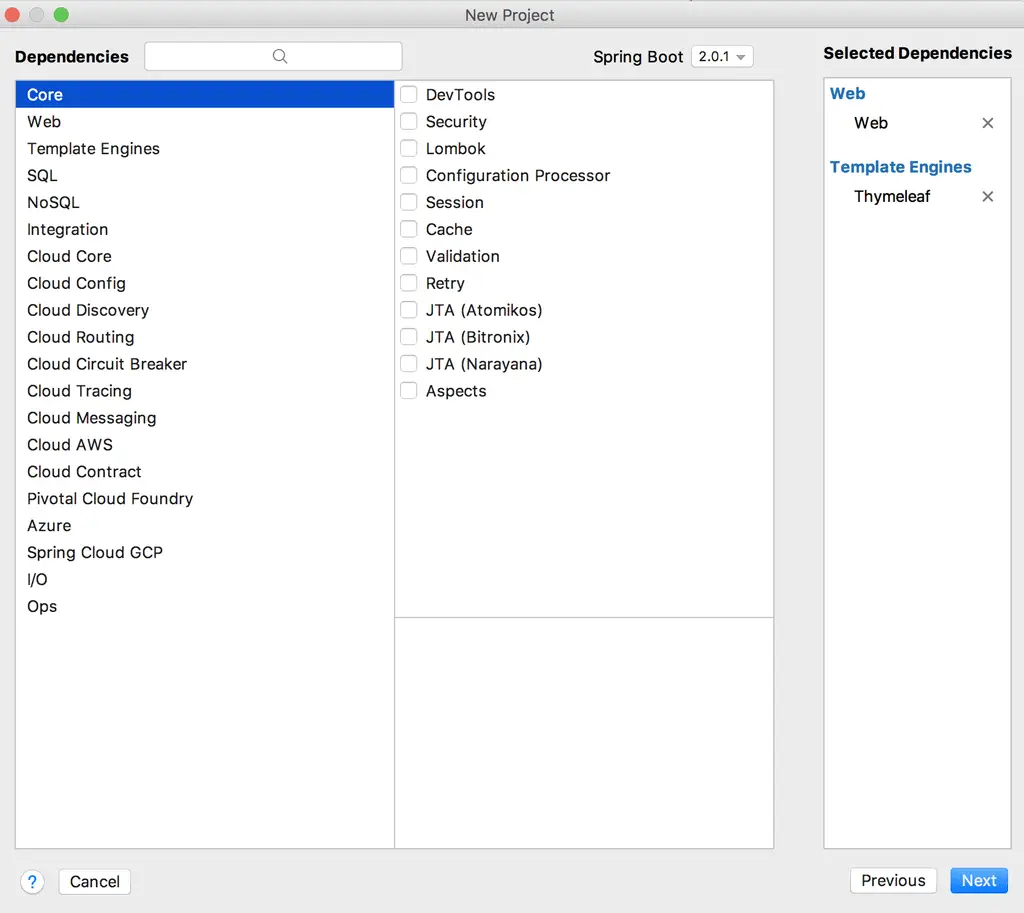
4. Select the Spring Boot version and other required dependencies for your project. Based on the selected dependencies, it will add correct Spring Boot Starters in the pom.xml file.
5. In the last part of the wizard, we need to select a project name and project location. Once selected click on the “Finish” button.
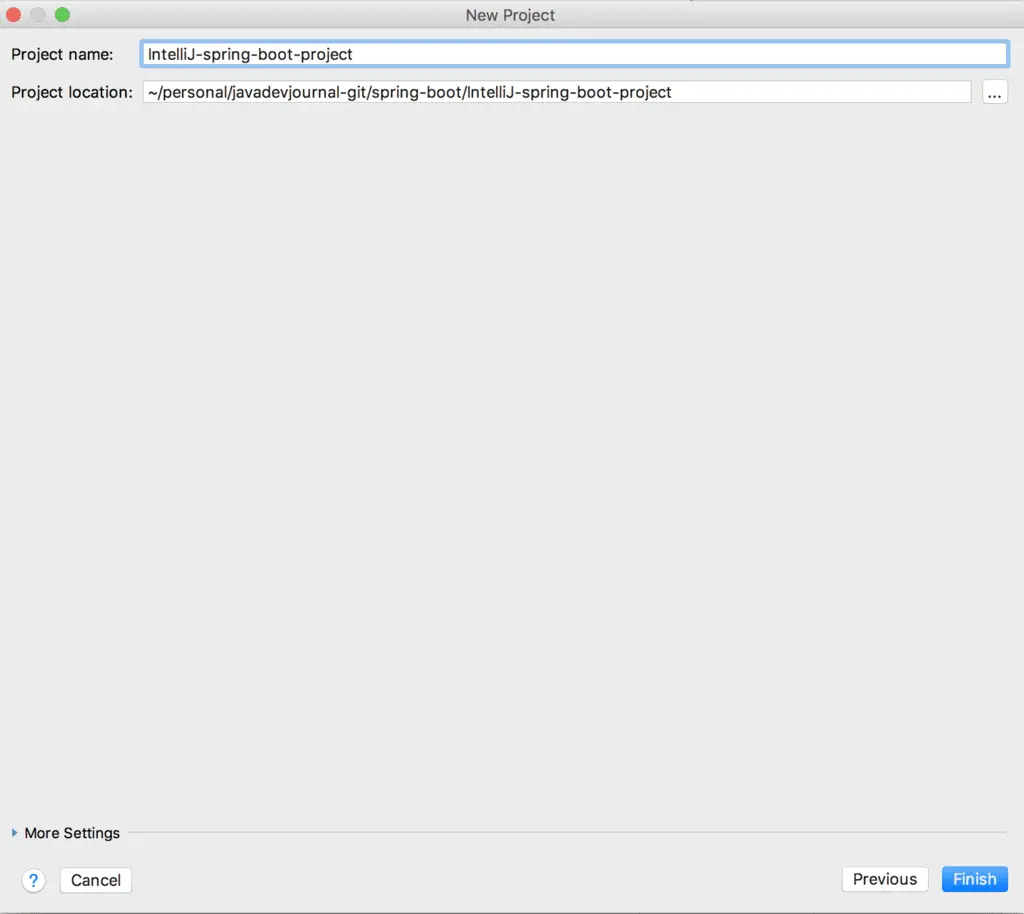
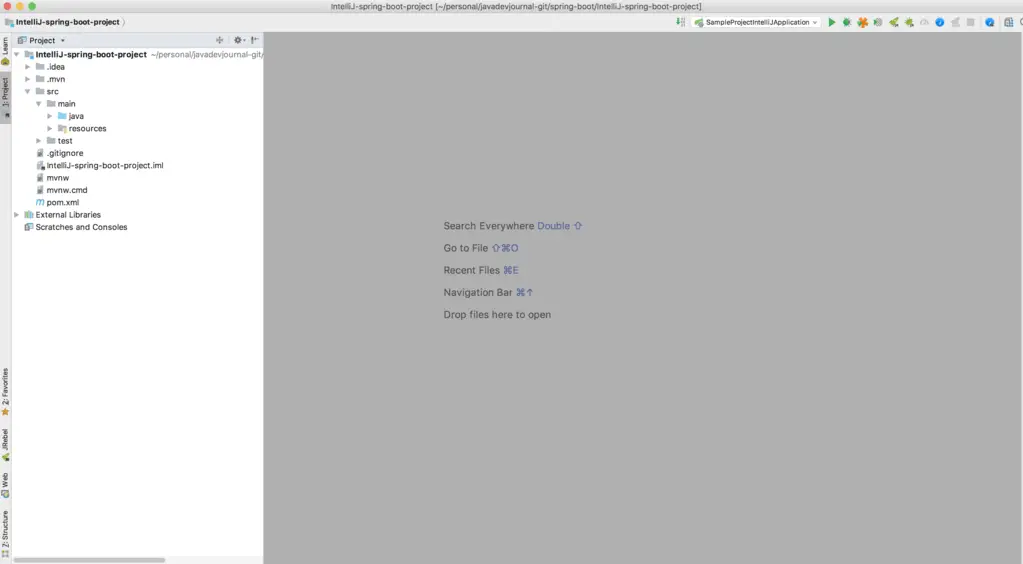
Once finished, IntelliJ IDEA import all the required dependencies and open the newly created a project to work on.
2. The pom.xml file
The pom.xml file contains all the building blocks for the Spring Boot application. Open the pom.xml file in the project’s root module.
<?xml version="1.0" encoding="UTF-8"?>
<project xmlns="http://maven.apache.org/POM/4.0.0" xmlns:xsi="http://www.w3.org/2001/XMLSchema-instance" xsi:schemaLocation="http://maven.apache.org/POM/4.0.0 http://maven.apache.org/xsd/maven-4.0.0.xsd">
   <modelVersion>4.0.0</modelVersion>
   <groupId>com.javadevjournal</groupId>
   <artifactId>demoproject</artifactId>
   <version>0.0.1-SNAPSHOT</version>
   <packaging>jar</packaging>
   <name>sample-project-IntelliJ</name>
   <description>How to create Spring Boot project using IntelliJ</description>
   <parent>
      <groupId>org.springframework.boot</groupId>
      <artifactId>spring-boot-starter-parent</artifactId>
      <version>2.0.1.RELEASE</version>
      <relativePath />
      <!-- lookup parent from repository -->
   </parent>
   <properties>
      <project.build.sourceEncoding>UTF-8</project.build.sourceEncoding>
      <project.reporting.outputEncoding>UTF-8</project.reporting.outputEncoding>
      <java.version>1.8</java.version>
   </properties>
   <dependencies>
      <dependency>
         <groupId>org.springframework.boot</groupId>
         <artifactId>spring-boot-starter-thymeleaf</artifactId>
      </dependency>
      <dependency>
         <groupId>org.springframework.boot</groupId>
         <artifactId>spring-boot-starter-web</artifactId>
      </dependency>
      <dependency>
         <groupId>org.springframework.boot</groupId>
         <artifactId>spring-boot-starter-test</artifactId>
         <scope>test</scope>
      </dependency>
   </dependencies>
   <build>
      <plugins>
         <plugin>
            <groupId>org.springframework.boot</groupId>
            <artifactId>spring-boot-maven-plugin</artifactId>
         </plugin>
      </plugins>
   </build>
</project>
We added spring-boot-starter-parent as the parent of our Spring Boot project. This parent provides several features in the Spring Boot application
- Configuration – Java Version and Other Properties.
- Dependency Management – Version of dependencies
- Default Plugin Configuration
For more detail, read What is Spring Boot
3. Spring Boot Main Application Class
When we created this project, Spring Initializr created the following class automatically to start our Spring Boot application.
package com.javadevjournal.demoproject;

import org.springframework.boot.SpringApplication;
import org.springframework.boot.autoconfigure.SpringBootApplication;

@SpringBootApplication
public class SampleProjectIntelliJApplication {
   public static void main(String[] args) {
        SpringApplication.run(SampleProjectIntelliJApplication.class, args);
  }
}
4. Run Application
Spring Boot main class contains the main method. This is just a standard method that follows the Java convention for an application entry point. Our main method delegates to Spring Boot’s SpringApplication class by calling run. SpringApplication bootstraps our application, starting Spring. We can run our application from the IntelliJ by clicking on the run application icon

As an alternative, we can use the run goal to start our application. Type mvn spring-boot:run from the root project directory to start the application. You should see output similar to the following.

[pullquote align=”normal”] Read our article Building an Application with Spring Boot to build a web application using Spring Boot [/pullquote]
Summary
In this small post, we covered building a Spring Boot application using IntelliJ. IntelliJ is really a powerful editor and provides first-class support to create and run Spring Boot based web applications.
Hey, I built my project following the instructions but i set the type to Gradle. When i run my main application class, i get the error “Process ‘command ‘C:/Program Files/Java/jdk1.8.0_251/bin/java.exe” finished with non-zero exit value 1″. Any idea on how to tackle this? Thanks!
Is that the complete error? Do you see any other error in the console?
Hi,
I followed the same steps using gradle. But I got below error”TLS Server certificate issued after 2019-04-16 and anchored by a distrusted legacy Symantec root CA: CN=VeriSign Class 3 Public Primary Certification Authority – G5, OU=”(c) 2006 VeriSign, Inc. – For authorized use only”, OU=VeriSign Trust Network, O=”VeriSign, Inc.”, C=US
“
Which JDK version are you using? There was one change in the JDK which can cause issue if the cert issued after April 16, 2019.Please refer to the following ticket for more detail
https://bugs.java.com/bugdatabase/view_bug.do?bug_id=8215012
https://blogs.oracle.com/java-platform-group/jdk-distrusting-symantec-tls-certificates
Great! BLOG
Thanks!!!
I followed the exact steps and got ‘Whitelabel Error Page’ at localhost 8080
did you get any error? What is the Spring Boot version you are using?
Create a controller like below then it will work.
package com.javadevjournal.demo.controller;
import org.springframework.web.bind.annotation.RequestMapping;
import org.springframework.web.bind.annotation.RestController;
@RestController
public class HelloWorldController {
@RequestMapping(“/”)
public String helloWorld(){
return “Hello World!!”;
}
}
Thanks bro
🙂
Hi, I followed same steps, but it cannot import springBoot packag. Got error will running application
“Error:(3, 32) java: package org.springframework.boot does not exist”.
Do we need to do some extra stuff?Please help
Are you using Intellij or did you imported the project in the IDE? Need more information to help you.Creating new application with Intellij is quite easy and clear, all you need to follow the creation Wizard.
good learning course. it is easy to learn and understand.
Thanks for your feedback!!!
good job