In this article, we will look at integrating Spring Boot with MongoDB. We will look at the different option to work with MongoDB using Spring Boot.
Spring Boot with MongoDB -Introduction
In this tutorial, we will show the integration process of MongoDB with spring boot. We know that spring boot is a popular framework that’s built on top of the spring frame. With spring boot we can build a project with minimal configuration. Nowadays we need not think about configuration related complexity to build and run a spring framework project. Spring boot provides many complex configurations without spending a lot of development time. And we know MongoDB also getting popularity as no-SQL database.
1. MongoDB Setup
Before we work on integrating Spring Boot with MongoDB, Let’s make sure we have installed and configured the MongoDB on our development environment. Follow the official guide for the installation instructions.
We can set up MongoDB by following the instructions of the below link. You should set up by following instructions for your operating system. After installation complete, start the MongoDB service. As I am using mac OS, I will execute brew services start [email protected]. We will discuss some basic operations like insert, update, delete things in this article. Let’s look at a few basic queries of MongoDB.
- To create a database, we will execute command
use test_db - Access test_db by executing command
show dbs - Isert some collection to test_db by executing command
db.test_db.insert({"employeeModel":{ “id”: 3,”name”:”Ayoosh” }}) - To show inserted data, execute command
db.test_db.find()
2. Setting up Application
Before we start, let’s create a simple Spring Boot application with spring web starter and Spring Data MongoDB as dependencies. We can use our IDE to generate the application or if you prefer, you can use Spring initializer to bootstrap your application.
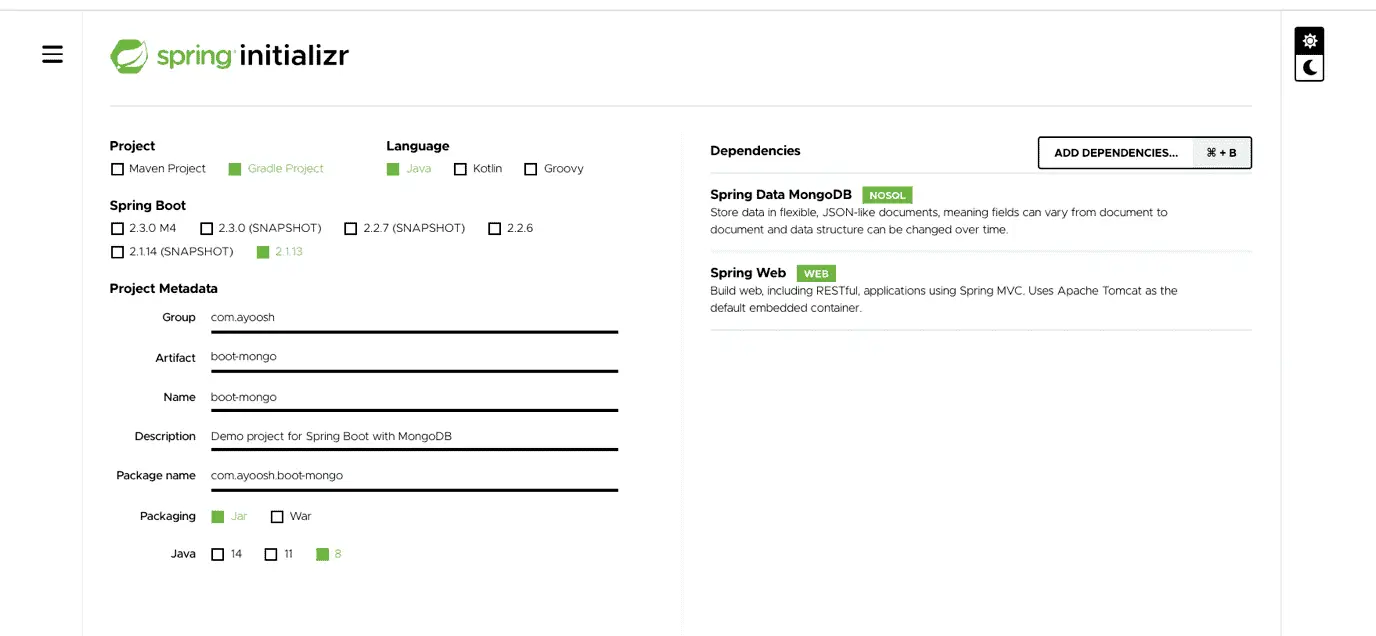
Click “Generate Button” to download the project structure to your local machine. We are adding the following dependencies in our project.
- Web Module–For web application setup.
- Spring Data MongoDB–MongoDB auto-configuration and integration support.
This is how our pom.xml look like:
<?xml version="1.0" encoding="UTF-8"?>
<project xmlns="http://maven.apache.org/POM/4.0.0" xmlns:xsi="http://www.w3.org/2001/XMLSchema-instance" xsi:schemaLocation="http://maven.apache.org/POM/4.0.0 https://maven.apache.org/xsd/maven-4.0.0.xsd">
   <modelVersion>4.0.0</modelVersion>
   <parent>
      <groupId>org.springframework.boot</groupId>
      <artifactId>spring-boot-starter-parent</artifactId>
      <version>2.1.13.RELEASE</version>
      <relativePath />
      <!-- lookup parent from repository -->
   </parent>
   <groupId>com.javadevjournal</groupId>
   <artifactId>boot-mongo</artifactId>
   <version>0.0.1-SNAPSHOT</version>
   <name>boot-mongo</name>
   <description>Demo project for Spring Boot with MongoDB</description>
   <properties>
      <java.version>1.8</java.version>
   </properties>
   <dependencies>
      <dependency>
         <groupId>org.springframework.boot</groupId>
         <artifactId>spring-boot-starter-data-mongodb</artifactId>
      </dependency>
      <dependency>
         <groupId>org.springframework.boot</groupId>
         <artifactId>spring-boot-starter-web</artifactId>
      </dependency>
      <dependency>
         <groupId>org.springframework.boot</groupId>
         <artifactId>spring-boot-starter-test</artifactId>
         <scope>test</scope>
      </dependency>
   </dependencies>
   <build>
      <plugins>
         <plugin>
            <groupId>org.springframework.boot</groupId>
            <artifactId>spring-boot-maven-plugin</artifactId>
         </plugin>
      </plugins>
   </build>
</project>
If you are using Gradle as build tools, build.gradle file should contain like below codes:
plugins {
  id 'org.springframework.boot' version '2.1.13.RELEASE'
  id 'io.spring.dependency-management' version '1.0.9.RELEASE'
  id 'java'
}
group = 'com.javadevjournal'
version = '0.0.1-SNAPSHOT'
sourceCompatibility = '1.8'
repositories {
  mavenCentral()
}
dependencies {
  implementation 'org.springframework.boot:spring-boot-starter-data-mongodb'
  implementation 'org.springframework.boot:spring-boot-starter-web'
  testImplementation 'org.springframework.boot:spring-boot-starter-test'
}
3. Application Overview
In the above discussion, we have already configured spring boot with MongoDB. Spring boot provides two ways to access MongoDB through application. One is MongoTemplate, and another is MongoRepository. We will provide examples of both ways.
For better understanding, we will develop an application to store and retrieve Employee information to and from the MongoDB database. We are defining an Employee model which will contain id, name, address fields. Spring data provides this facility to access the MongoDB database through Spring Data MongoDB.
4. Database configuration
To connect our Spring Boot application with MongoDB, let’s define the database configuration in the application.properties file. Spring Boot auto-configuration will automatically use these properties once it’s boot strap the MongoDB auto-configurations. Add the following properties (Change as per your configurations)
spring.data.mongodb.database=employee_db
spring.data.mongodb.port=27017
spring.data.mongodb.host=localhost
5. Employee Entiry
To store and retrieve the data from MongoDB, let’s create an entity class in the system representing the underlying table. This is how our employee class look like:
package com.mongo.springbootmongodb;

import org.springframework.data.annotation.Id;
import org.springframework.data.mongodb.core.mapping.Document;
import java.util.Date;

@Document
public class EmployeeModel {
    @Id
    private long id;
    private String name;
    private String address;
    private Date creationDate = new Date();

    public long getId() {
        return id;
    }

    public void setId(long id) {
        this.id = id;
    }

    public String getName() {
        return name;
    }

    public void setName(String name) {
        this.name = name;
    }

    public String getAddress() {
        return address;
    }

    public void setAddress(String address) {
        this.address = address;
    }

    public Date getCreationDate() {
        return creationDate;
    }

    public void setCreationDate(Date creationDate) {
        this.creationDate = creationDate;
    }
}
5. Employee Repository
We will now configure the spring mongo repository interface to support this employee model. We can see that EmployeeRepository inherits MongoRepository which is a part of the spring data mongo repository.
import org.springframework.data.mongodb.repository.MongoRepository;
import org.springframework.stereotype.Repository;

@Repository
public interface EmployeeRepository extends MongoRepository < EmployeeModel, Long > {

}
6. REST Controller
Spring Boot will automatically handle other parts of the integration. Let’s create a REST controller to check the complete workflow We will see the GET, POST HTTP methods examples.
package com.mongo.springbootmongodb;
import org.slf4j.Logger;
import org.slf4j.LoggerFactory;
import org.springframework.data.mongodb.core.MongoTemplate;
import org.springframework.web.bind.annotation.*;
import java.util.List;

@RestController
@RequestMapping(value = "/template")
public class EmployeeEndpointUsingTemplate {
    private final Logger logger = LoggerFactory.getLogger(getClass());

    private final MongoTemplate mongoTemplate;

    public EmployeeEndpointUsingTemplate(MongoTemplate mongoTemplate) {
        this.mongoTemplate = mongoTemplate;
    }

    @RequestMapping(value = "", method = RequestMethod.GET)
    public List < EmployeeModel > getAllUsers() {
        logger.info("Getting all Employees.");
        return mongoTemplate.findAll(EmployeeModel.class);
    }

    @RequestMapping(value = "/{id}", method = RequestMethod.GET)
    public EmployeeModel getEmployee(@PathVariable long id) {
        logger.info("Getting Employee with ID: {}.", id);
        EmployeeModel employeeModel = mongoTemplate.findById(id, EmployeeModel.class);
        return employeeModel;
    }

    @RequestMapping(value = "/create", method = RequestMethod.POST)
    public EmployeeModel add(@RequestBody EmployeeModel employeeModel) {
        logger.info("Saving Employee.");
        return mongoTemplate.save(employeeModel);
    }
}<!--?code ></pre>
<p> </p>
<h2><span style="font-family: 'arial black', sans-serif;">7. Build and Deploy Application</span></h2>
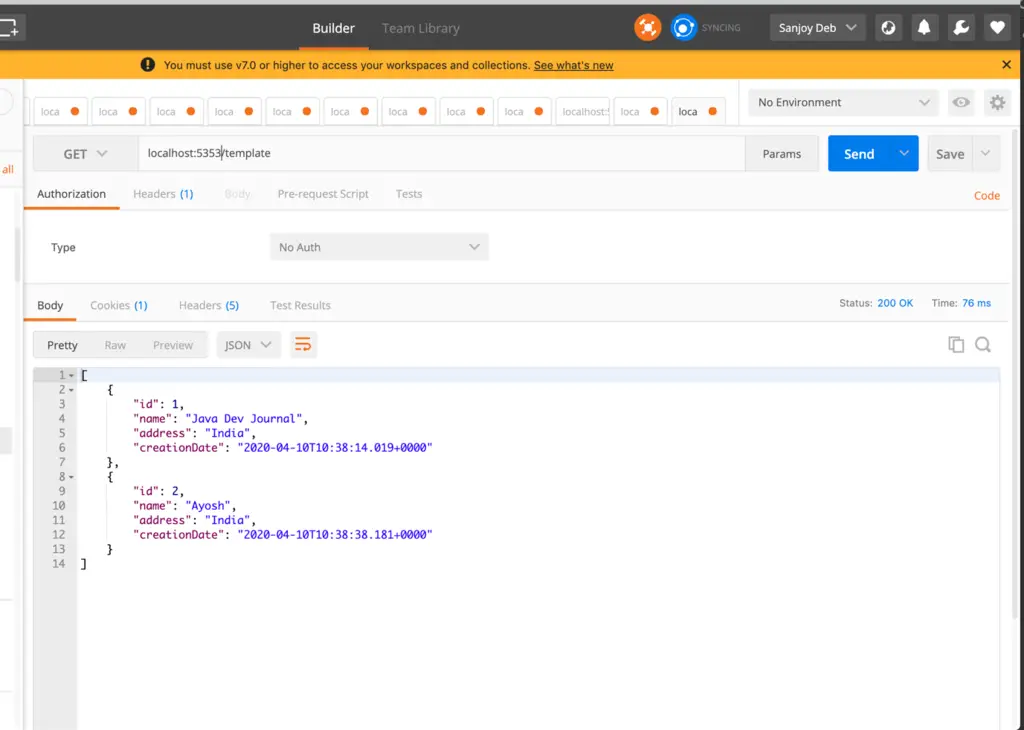
<p>We already completed configured the application now we will run the application with <strong>gradle bootrun</strong> or <strong>gradlew bootrun</strong>. After deployment done, we will test with postman application like below images.We will create an entry of the employee model with the body in JSON format like below image.</p>
<p><img class="aligncenter wp-image-4198 size-large" src="https://www.javadevjournal.com/wp-content/uploads/2020/04/a-screenshot-of-a-social-media-post-description-a-1024x574.png" alt="A screenshot of a social media post
Description automatically generated" width="1024" height="574" ?-->After sending a button click, it will create an entry to the database. Then we should call the GET method to verify the entry is created or not like the below image.

After clicking on the send button it will return an entry like the above image. So, entry is created and the same way we can test the DELETE method.
8. Using MongoTemplate
We will implement an alternate way to access the database with MongoTemplate. To use the MongoTemplate, auto-wire MongoTemplate to the controller.
import org.slf4j.Logger;
import org.slf4j.LoggerFactory;
import org.springframework.data.mongodb.core.MongoTemplate;
import org.springframework.web.bind.annotation.*;
import java.util.List;
@RestController
@RequestMapping(value = "/template")
public class EmployeeEndpointUsingTemplate {
private final Logger logger = LoggerFactory.getLogger(getClass());
private final MongoTemplate mongoTemplate;
public EmployeeEndpointUsingTemplate(MongoTemplate mongoTemplate) {
this.mongoTemplate = mongoTemplate;
}
@RequestMapping(value = "", method = RequestMethod.GET)
public List < EmployeeModel > getAllUsers() {
logger.info("Getting all Employees.");
return mongoTemplate.findAll(EmployeeModel.class);
}
@RequestMapping(value = "/{id}", method = RequestMethod.GET)
public EmployeeModel getEmployee(@PathVariable long id) {
logger.info("Getting Employee with ID: {}.", id);
EmployeeModel employeeModel = mongoTemplate.findById(id, EmployeeModel.class);
return employeeModel;
}
@RequestMapping(value = "/create", method = RequestMethod.POST)
public EmployeeModel add(@RequestBody EmployeeModel employeeModel) {
logger.info("Saving Employee.");
return mongoTemplate.save(employeeModel);
}
}Test this implementation with postman same way we have done for the previous one. We need to add /template path in the url only. We will get the same result as above postman request samples provide.
Summary
In this post, we looked at integrating Spring Boot with MongoDB. We looked at the option to use MongoTemplate and MongoRepository to access the data for our application using Spring Boot. The source code for this application is available on GitHub.
Hi,
Nice article! Just one thing, section 6 has the code example for template usage. It seems that it should be the following https://github.com/javadevjournal/javadevjournal/blob/master/Spring-Boot/spring-boot-mongodb/src/main/java/com/mongo/springbootmongodb/EmployeeEndpoint.java
Regards