In this article of Spring security tutorial, we will look at the Spring Security with Thymeleaf. We will see how to use the Thymeleaf spring security dialect to handle the frontend details for our application.
Spring Security With Thymeleaf
While working on the web application, we will get in to situation where we like to conditionally render specific sections in the page based on the authorization rule. Let’s take an example of the header in most of the application.
- We may want to show the login link in case user is not authorized.
- For authorized user, we like to show link to account section and logout.
Thymeleaf is a modern server side templating engine with a powerful and flexible integration with Spring security.Thymeleaf provides a separate module namely Spring security integration module to handle these use cases.
1. Dependencies
To use Thymeleaf dialect with Spring security in your web application, we need to include the spring security with Thymeleaf module in our application.This is how our pom.xml will look like
<dependency>
   <groupId>org.thymeleaf.extras</groupId>
   <artifactId>thymeleaf-extras-springsecurity5</artifactId>
   <version>3.0.4.RELEASE</version>
</dependency>
Make sure you are including the latest version in the pom.xml file. With the application setup done, let’s see how use the different options with Spring security.
2. Security Dialect
We will use our Spring security course application to show the different security dialect with Thymeleaf. You can download the application from our GitHub repository. The Spring security dialect allows us to conditionally display content or link based on the user roles. The core tag available with spring security Thymeleaf is the <sec:authorize*> tag. Think of this tag as a <if> tag available in the JSTL tag library. The <sec:authorize*> tag can take expression and will display the page content conditionally.
3. sec:Authorization Tag
The <sec:authorize*> tag will help us to conditionally show certain information on the web pages. We can use the SpEL expressions to get a fine control on the rules. Let’s take few example to understand it more easily.
- In case we want to show certain content for users with role as “
USER“, we can easily do that with the help ofhasRole()–<div sec:authorize ="hasRole('USER')">. This section will only be visible if the current user have a USER role. <div sec:authorize ="isAuthenticated()">will work for all authenticated user. It will display this section to all authenticated user. Remember, if you are not authenticated, the div content will not be visible.
The SpEL evaluation is performed by the same code behind the scenes as the expressions used in the antMatchers().
Technically you have the access to the same set of build-in functions and properties as available in the anyMatchers() while using the <sec> tag in the web application user interface.
4. sec:authentication Tag
While working on the Spring security tag, you may need information about the authenticated principal or the authentication request.Spring security authentication interface provides access to these details and we can access these in the spring security tags using the <sec:authentication> tag. Here are some common use case for the <sec:authentication> tag.
- Displaying the name of the logged in user –
<div sec:authentication="name"> - Displaying
authorities/ accessroles for the authenticated user –<div sec:authentication="principal.authorities"> - We can also use the
sec:authentication="prop"to outputs apropproperty of the authentication object.
5. URL Access Rules
Spring security tag library also provides the ability to control the content based on the existing URL authorization rules defined in our security configuration file. We can do this with the use of authorizeRequests() and antMatchers() methods. Let’s take an example, where we want to make sure that all link with /admin should be displayed only for the Admin user. We can do this in 2 ways.
- We can use the
sec:AuthorizationTag as described in section 3. - Define the rule in the Spring security config file and use the
<sec:authorize-url>tag.
This is how we will define the rule in the spring security config file:
@Override
protected void configure(HttpSecurity http) throws Exception {
     http.authorizeRequests()
         ...
         .antMatchers("/admin/**").hasAuthority("ADMIN")
         ..
}
On the frontend, we can use the <sec:authorize-url> tag to show the content only in case user have the ADMIN role.
<li sec:authorize-url="/admin/">
   <a id="admin" th:href="@{/admin/manage}">Admin</a>
</li>
You can even extend this to add the HTTP method as an additional condition
<li sec:authorize-url="GET /admin/">
   <a id="admin" th:href="@{/admin/manage}">Admin</a>
</li>
Using the <sec:authorize-url> spring security tag provides the ability to move away the auth check from the UI to the spring security configuration file this can help to abstract away specific check from pages(remember you need put hasRole("ADMIN")). Be aware that the HTTP method should match the case specified in your security antMatchers() method, otherwise they may not match as you expect.
6. Expression Utility Objects
Spring Security with Thymeleaf also provide the #authentication object which we can use to build conditional logic. This is similar to the sec:authentication tag.Let’s see few examples in action.
<div th:text="${#authentication.name}">
 </div>
We can also use the #authentication object to build logic using if condition
<div th:if="${#authorization.expression('hasRole(''ROLE_ADMIN'')')}">
  ADMIn section
</div>
7. Testing Application
Download the Spring security application from the GitHub and run the application. Once the application is up and running, login to the application. Once you are in the account section, check the top right panel, you will see your name with option to logout. To display the logged in user name, we are using the Spring security thymeleaf tag library.
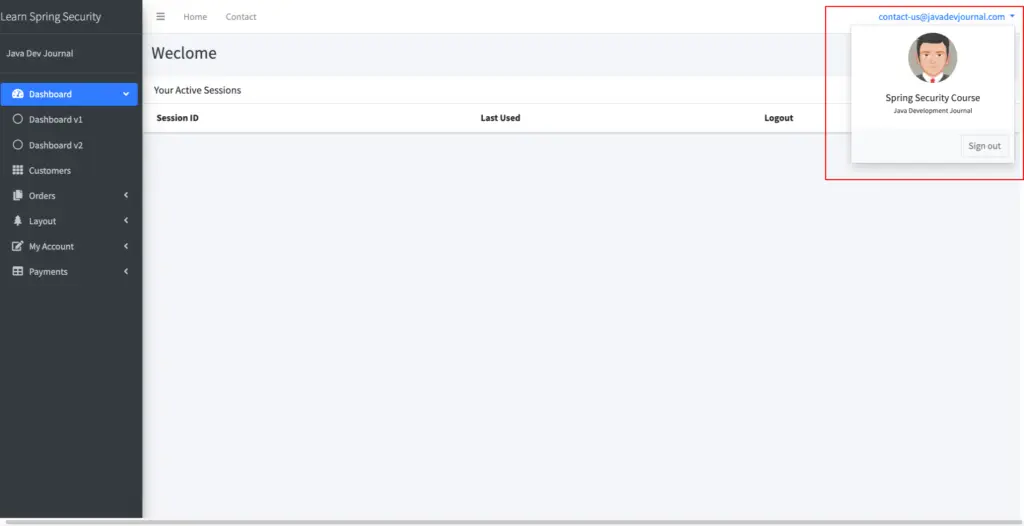
Here is the code with spring security thymeleaf tag:
<a href="#" class="dropdown-toggle" data-toggle="dropdown" aria-expanded="false">
     <span class="hidden-xs" sec:authentication="name"></span>
</a>
Summary
In this article, we talked about the Spring Security with Thymeleaf. We checked different spring security tags available with Thymeleaf and how we can use the different tags while building our web application. You can download the complete Spring security application from our GitHub repository.