Documenting your REST API is important. In this post, we will look at Swagger 2 for Spring REST API. Let’s see how to document your REST APIs using Swagger.
Introduction
REST specification does not enforce any rules to document the REST APIs, current momentum of REST and micro-services require a good documentation of the APIs. We should document the changes to the API to ensure that the API consumer have the updated information. Creating the documentation manually is time-consuming and tedious process. Swagger provides an option to generate the API documentation automatically and it also ensure that any changes to the API is available to the customer immediately. In this post, we will learn to use Swagger to generate REST API documentation.
1. Swagger Introduction
Swagger is a powerful yet easy-to-use suite of API developer tools for teams and individuals, enabling development across the entire API life-cycle, from design and documentation, to test and deployment. It provides data in JSON format and an UI using the Swagger-UI. In this post we will use springfox. Before we document our Spring REST web service with Swagger, let’s create a simple REST example for this post.
2. Creating REST API
To see the Spring Boot Swagger documentation in action, let’s create a simple REST API application. We will use the Spring Boot for our example project. You can use your Java IDE or Spring Boot initializer to bootstrap the project. As we are creating a web project, add the following dependencies in the project
- Web
This is how our initial pom.xml look like:
<dependencies>
    <dependency>
        <groupId>org.springframework.boot</groupId>
        <artifactId>spring-boot-starter-actuator</artifactId>
    </dependency>
    <dependency>
        <groupId>org.springframework.boot</groupId>
        <artifactId>spring-boot-starter-web</artifactId>
    </dependency>

    <dependency>
        <groupId>org.springframework.boot</groupId>
        <artifactId>spring-boot-starter-test</artifactId>
        <scope>test</scope>
    </dependency>
</dependencies>
2.1. Creating REST Controller
Let’s create a REST controller to serve product data to the client API. We will add the swagger 2 support for this REST controller.
package com.javadevjournal.controller;

import com.javadevjournal.data.Product;
import org.springframework.web.bind.annotation.GetMapping;
import org.springframework.web.bind.annotation.PathVariable;
import org.springframework.web.bind.annotation.RestController;

import java.util.Arrays;
import java.util.List;
import java.util.stream.Collectors;

@RestController("/v2")
public class ProductController {

    List products = Arrays.asList(
        new Product("1","G Tech", "G Tech Hard drive", 230.45, 25),
        new Product("2","WD SSD", "WD HDD", 150, 15),
        new Product("3","Samsung SSD", "Samsung Solid State Drive", 100, 12),
        new Product("5","Sandisk Pen Drive", "Sandisk Pen Drive", 12, 200)
    );


    @GetMapping("/products/{code}")
    public Product getProduct(@PathVariable("code") String code){
        return products.stream()
                .filter(p->p.getCode().equalsIgnoreCase(code))
                .collect(Collectors.toList()).get(0); // we know this can throw NPE but let's keep our example simple
    }

    @GetMapping("/products")
    public List getProducts(){
        return products;
    }
}
Our REST controller is a simple controller with only 2 method:
- Return product based on the product code
- Return all available products
This is how the Product class look like:
public class Product {

    private String code;
    private String name;
    private String description;
    private double price;
    private long stock;


    public Product(String code, String name, String description, double price, long stock) {
        this.code = code;
        this.name = name;
        this.description = description;
        this.price = price;
        this.stock = stock;
    }

    //get and set methods
}
3. Swagger 2 for Spring REST API
Let’s add the swagger 2 support for our application. To add swagger 2 support to our Spring REST web service, add the springfox-swagger2 and springfox-swagger-ui dependencies to the pom.xml file:
<!-- https://mvnrepository.com/artifact/io.springfox/springfox-swagger2 -->
<dependency>
    <groupId>io.springfox</groupId>
    <artifactId>springfox-swagger2</artifactId>
    <version>2.9.2</version>
</dependency>
<!-- https://mvnrepository.com/artifact/io.springfox/springfox-swagger-ui -->
<dependency>
    <groupId>io.springfox</groupId>
    <artifactId>springfox-swagger-ui</artifactId>
    <version>2.9.2</version>
</dependency>
First one add the Swagger capability to our project and will return the response in Json format while the second dependency add the UI interface for the swagger documentation. Let’s add basic Java configuration to see the swagger in action.
4. Java Configuration
The Docket bean is the main central point for our Swagger configuration.
import org.springframework.context.annotation.Bean;
import org.springframework.context.annotation.Configuration;
import springfox.documentation.builders.PathSelectors;
import springfox.documentation.builders.RequestHandlerSelectors;
import springfox.documentation.spi.DocumentationType;
import springfox.documentation.spring.web.plugins.Docket;
import springfox.documentation.swagger2.annotations.EnableSwagger2;

@Configuration
@EnableSwagger2 //  main annotation to enable swagger support
public class SwaggerConfig {

    /**
     *
     * @return Docket
     */
    @Bean
    public Docket api() {
        return new Docket(DocumentationType.SWAGGER_2)
            .select()
            .apis(RequestHandlerSelectors.any())
            .paths(PathSelectors.any())
            .build();
    }
}
Let’s analyze few important points from this code:
@EnableSwagger2annotation enable swagger 2 in our project.- We defined the Docket bean.
- The
select()method returns theApiSelectorBuilderinstance. - The
ApiSelectorBuilderprovides was to control endpoints exposed by Swagger. PathSelectors.any()ensure that all the API documentation is available.
4.1. Swagger Json Output
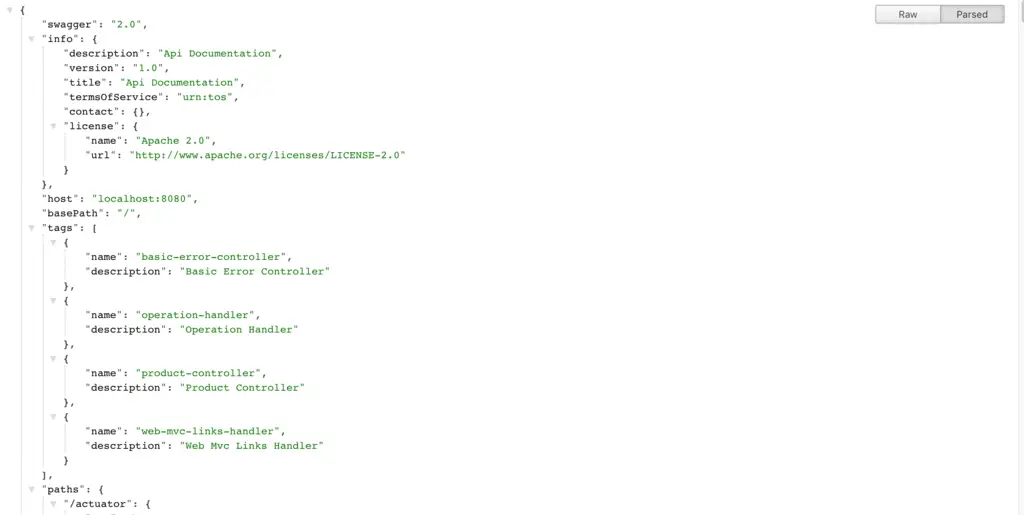
Let’s build and deploy our application. Once the application is up and running, open the following URL http://localhost:8080/v2/api-docs.This URL will return the entire documentation in JSON format. This is how the output may look like:
This looks good, but this output is only for the client which can read the JSON format and can render the output. Swagger 2 also provides an UI interface for the documentation.In this next section, we will look at enabling the UI component for our Spring REST web service.
5. Swagger UI
Let’s see how to enable the Swagger UI component:
5.1. Adding Springfox
To use the Swagger UI, let’s add the following Maven dependency in our pom.xml file:
<dependency>
        <groupId>org.springframework.boot</groupId>
        <artifactId>spring-boot-starter-test</artifactId>
        <scope>test</scope>
    </dependency>
</dependencies>
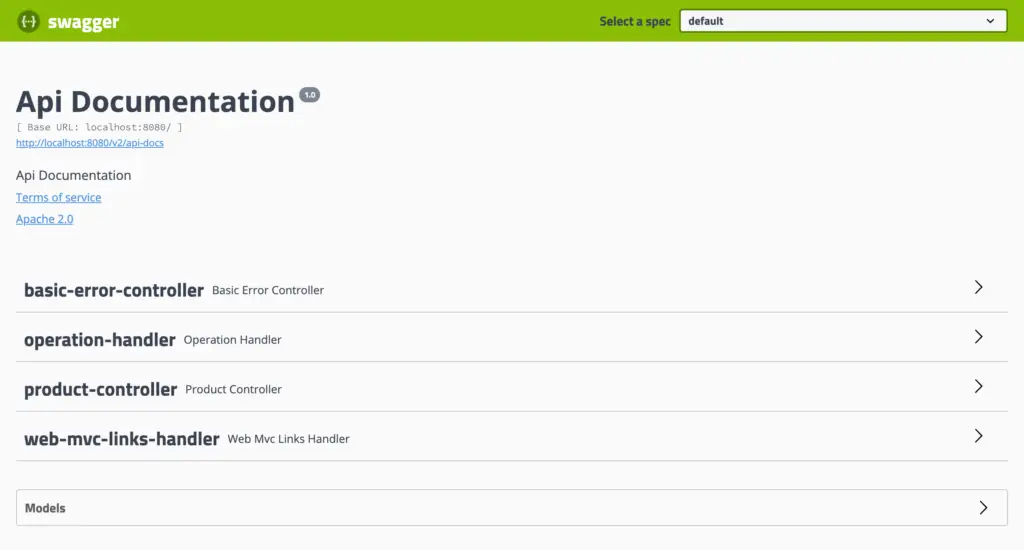
Build and deploy the application and open the following URL http://localhost:8080/swagger-ui.html.You will see a similar output:
6. Swagger Customization
The above example only use the out of the box feature of the Swagger. The Docket bean provides several options to customize or configure the swagger response. Let’s see some common use case which require the customization of Swagger API.
6.1. Filtering Response
While working on the public API’s, we may like to expose the documentation for the publicly available API’s or only for a certain set of features. Swagger API provides a way to filter the response with the help of apis() and paths() method. Let’s take an example where we only want to expose a specific package in for the documentation. This can be done by passing the package information to the api’s method.
@Bean
 public Docket api() {
     return new Docket(DocumentationType.SWAGGER_2)
         .select()
         .apis(RequestHandlerSelectors.basePackage("com.javadevjournal.controller"))
         .paths(PathSelectors.any())
         .build();
 }
6.2. API Info
If you like to customize the Info section of the Swagger, we can do this with the help of the apiInfo() method:
@Bean
  public Docket api() {
      return new Docket(DocumentationType.SWAGGER_2)
          .select()
          .apis(RequestHandlerSelectors.basePackage("com.javadevjournal.controller"))
          .paths(PathSelectors.any())
          .build()
          .apiInfo(getApiInfo());
  }

  private ApiInfo getApiInfo() {
      return new ApiInfo("Swagger2 Api Documentation",
          "How to generate Swagger documentation for your Rest API",
          "1.0", "urn:tos",
          new Contact("Java Dev Journal", "www.javadevjournal.com", "[email protected]"),
          "Apache 2.0", "http://www.apache.org/licenses/LICENSE-2.0", Collections.emptyList());
  }
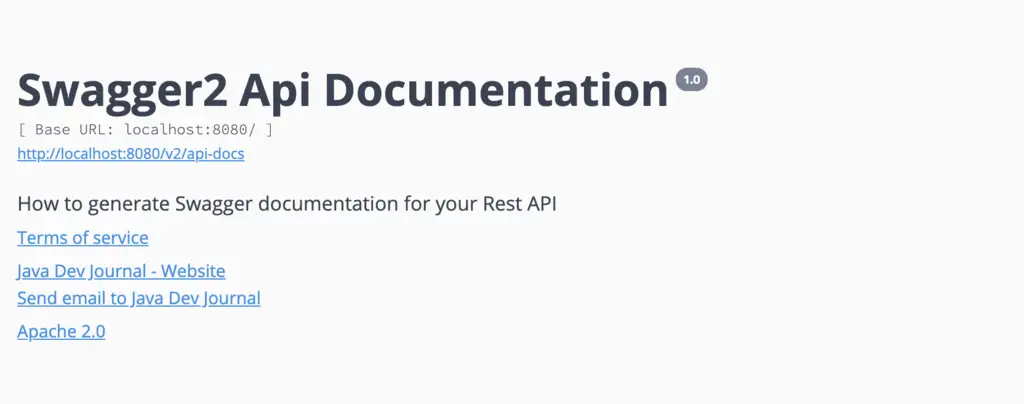
Let’s see how this will change the swagger output:
After the changes
7. Swagger 2 Annotation
Let’s inspect some annotation available with API which we can use to customize the output:
7.1. @Api annotation
This annotation is useful to add some basic information to our method. Let’s see how to use this for our controller:
@Api(value = "ProductController" , tags = {"Product Controller"})
@SwaggerDefinition(tags = {
        @Tag(name = "Product Controller", description = "Write description here")
})
@RestController("/v2")
public class ProductController {
}
7.2. @ApiOperation and @ApiResponse
To provide the information about the method and response, add these annotations to the methods:
@ApiOperation(value = "List of all products", response = ArrayList.class, tags = "getProducts")
@ApiResponses(value = {
        @ApiResponse(code = 200, message = "OK"),
        @ApiResponse(code =404, message = "404 error")
    })
@GetMapping("/products")
public List getProducts(){
    return products;
}
7.3. The @ApiModelProperty
Add this annotation to add description to the output:
public class Product {

    @ApiModelProperty(name = "code",required = true, value = "123", notes = "product unique code")
    private String code;

    @ApiModelProperty(name = "name",required = true,value = "demo name", notes = "name of the product")
    private String name;

    @ApiModelProperty(name = "description", required = true,value = "sample description", notes = "product description")
    private String description;

    @ApiModelProperty(name = "price", required = true, value = "23.45", notes = "product price")
    private double price;

    @ApiModelProperty(name = "stock", required = true, value = "12", notes = "product stock")
    private long stock;
}
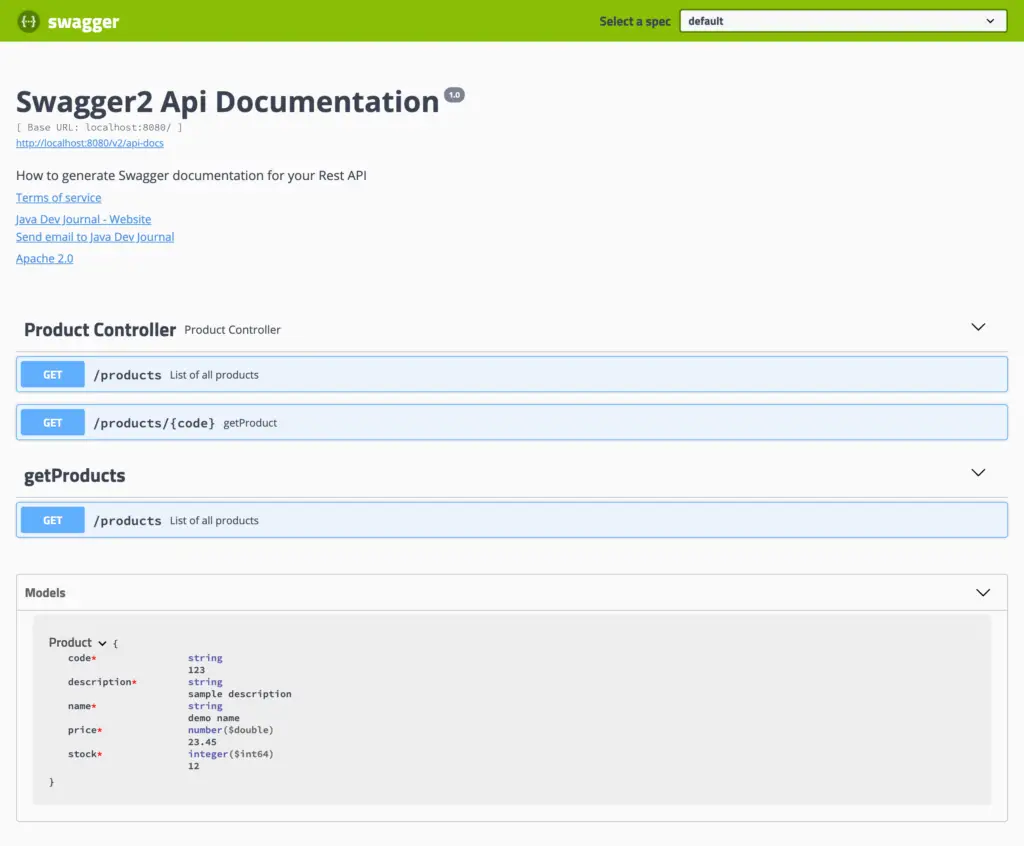
Here is our final Swagger UI output:
Summary
In this post, we saw how to use Swagger 2 for Spring REST API. We learned how to set up the spring boot swagger to generate JSON and UI output for the Spring REST API. We saw how to customize the output of the Swagger API. At the end of the section, we looked at some of the most common annotation available with the Swagger. You can download the source code for this tutorial from the GitHub.


