Creating a Web Application with Spring Boot
In this post, we will explore details of Creating a Web Application with Spring Boot. We will explore how Spring Boot can help you to accelerate your application development.We will be building a simple web application with Spring Boot and add some useful services to it.
1. Introduction
One of the main challenges to starting up a new project is an initial setup for the project. We need to take a call about the different directory structure and also need to make sure we are following all the industry standards.For creating a web application with Spring Boot, we need following tools
- Our preferred IDE (I will be using IntelliJ)
- Maven
- JDK 1.8+
2. Creating Project Structure
There are multiple ways to use Spring Boot Initializr to generate project structure for you.
- Using Spring Initializr Web Interface.
- Use Spring Boot CLI tool.
- Use your IDE
For the simplicity of this post, we are using Spring Initializer web interface to generate project Structure.
Spring Initializr Web interface your browser and you will be presented with a wizard to start your configurations.
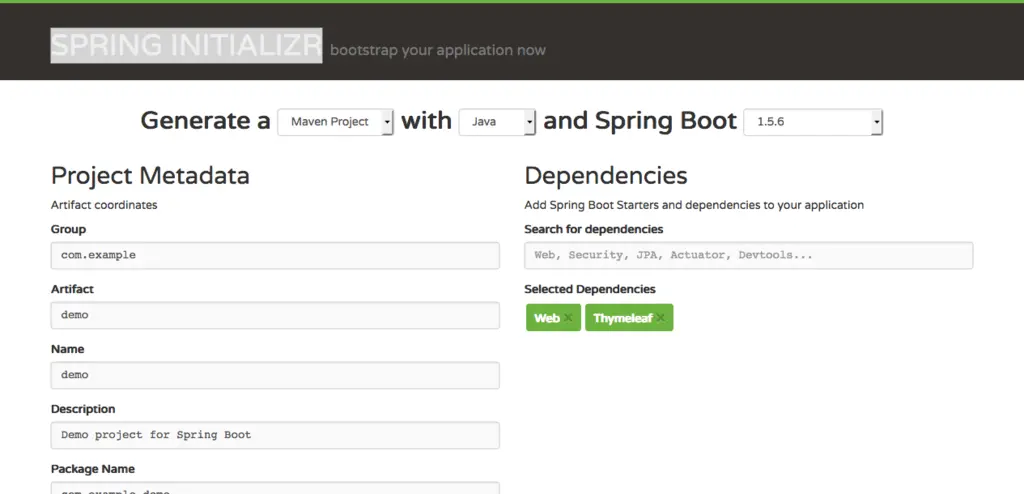
You are required to fill some information in the web interface to start with
- What kind of project you want to generate (Maven or Gradle)
- What is your preferred language (Apart from Java you will get an option for Kotlin and Groovy)?
- Spring Boot Version
- Standard project group and artifact details.
- Dependencies.
Dependencies is an interesting feature in the web interface, based on your selected Dependencies, web interface will automatically add Spring Boot Starter dependencies in the generated pom.xml file.In case you want a more control on the generated project structure or not sure what all dependencies you want to add to your project, click on the “Switch to the full version”.
We will be using The Web and Thymeleaf (For UI) for this post.
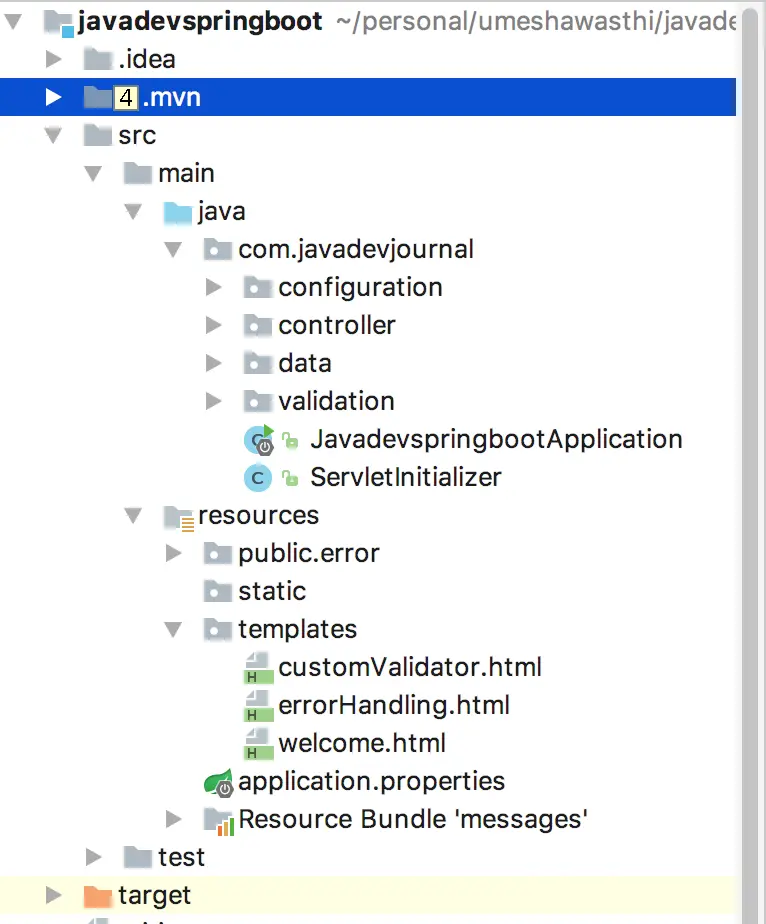
3. Project Structure
Spring Boot does not require any specific code layout or structure.We can always follow some of the best practices suggested by Spring Boot team, however, final structure will be driven by your project requirement.
Here is the layout of our sample application
4. Pom.xml
Let’s start looking into pom.xml file to understand Spring Boot configurations in more detail. I will be covering only Spring Boot related changes in pom.xml. Here is the pom.xml file from our sample project.
<?xml version="1.0" encoding="UTF-8"?>
<project xmlns="http://maven.apache.org/POM/4.0.0" xmlns:xsi="http://www.w3.org/2001/XMLSchema-instance"
   xsi:schemaLocation="http://maven.apache.org/POM/4.0.0 http://maven.apache.org/xsd/maven-4.0.0.xsd">
   <modelVersion>4.0.0</modelVersion>

   <groupId>com.javadevjournal</groupId>
   <artifactId>javadevspringboot</artifactId>
   <version>0.0.1-SNAPSHOT</version>
   <packaging>war</packaging>

   <name>javadevspringboot</name>
   <description>Java Dev Journal project for Spring Boot</description>

   <parent>
      <groupId>org.springframework.boot</groupId>
      <artifactId>spring-boot-starter-parent</artifactId>
      <version>1.5.4.RELEASE</version>
      <relativePath/> <!-- lookup parent from repository -->
   </parent>

   <properties>
      <project.build.sourceEncoding>UTF-8</project.build.sourceEncoding>
      <project.reporting.outputEncoding>UTF-8</project.reporting.outputEncoding>
      <java.version>1.8</java.version>
   </properties>

   <dependencies>
      <dependency>
         <groupId>org.springframework.boot</groupId>
         <artifactId>spring-boot-starter-thymeleaf</artifactId>
      </dependency>
      <dependency>
         <groupId>org.springframework.boot</groupId>
         <artifactId>spring-boot-starter-web</artifactId>
      </dependency>
      <dependency>
         <groupId>org.springframework.boot</groupId>
         <artifactId>spring-boot-starter-tomcat</artifactId>
         <scope>provided</scope>
      </dependency>
      <dependency>
         <groupId>org.springframework.boot</groupId>
         <artifactId>spring-boot-starter-test</artifactId>
         <scope>test</scope>
      </dependency>
   </dependencies>

</project>
One of the main features of Spring Boot is the “Starters”, they are an easy way to add required dependencies (jars) in our class path. When using Spring Boot, we don’t have to add jar/dependencies in our class path (In case a starter is not available, you might have to add these dependencies in the pom.xml or can create your own custom starter). We just need to add correct “Starters” in our pom.xml file and Spring Boot will make sure to add those dependencies automatically.
5. Main Application
Here is our main Spring Boot application class, this is a Spring Configuration class. The annotation @SpringBootApplication enables the Spring Context and all the startup magic of Spring Boot.
@SpringBootApplication
public class WebApplication extends WebMvcConfigurerAdapter {

   public static void main(String[] args) {
      SpringApplication.run(WebApplication.class, args);
   }
}
5. 1 @SpringBootApplication Annotation
@SpringBootApplication annotation. @SpringBootApplication is equivalent to using @Configuration, @EnableAutoConfiguration and @ComponentScan with their default values.If you are starting your project, it’s recommended to use annotation.
Using @SpringBootApplication in your main class is equivalent to following 3 annotations
@Configurationas a source of bean definitions@EnableAutoConfigurationIt gives Spring Boot an idea as to how you want to configure your application.@ComponentScanto automatically pick up all Spring components, including@Configurationclasses
5. 2 Main Method
Another interesting feature of our main class is the main method. This is a standard method that will follow standard Java workflow. Our main class will pass on control to Spring Boot SpringApplication class.
SpringApplication Class run method will be used to BootStrap an application.
6. Welcome Controller
Last part of our setup, we will create a welcome controller which will be responsible to handles GET requests for /greeting by returning the name of a View, in this case, “welcome”. A View is responsible for rendering the HTML content.
import org.springframework.stereotype.Controller;
import org.springframework.web.bind.annotation.RequestMapping;


@Controller
public class WelcomeController {

    @RequestMapping("/welcome")
    public String welcome() {

        return "welcome";
    }
}
This is a very simple controller but has covered a lot of points in our setup.
@Controllerannotation indicates that an annotated class is a"Controller"(e.g. a web controller).@RequestMappingannotation ensures thatHTTPrequests to /welcome are mapped to thewelcome()method.- We have not specified any method to the
@RequestMappingannotation as default maps allHTTPoperations by default. - As we are using
Thymeleaffor view technology and returning “welcome” fromwelcome()method,Thymeleafparses the templatewelcome.htmland produce the output.
6. 1 UI Template
Here is our simple Thymeleaf HTML template.
<!DOCTYPE HTML>
<html xmlns:th="http://www.thymeleaf.org">
<head>
    <title>Getting Started: Serving Web Content</title>

</head>
<body>
Hello and Welcome to our Web Application
</body>
</html>
While using Thymeleaf as our template engine, Spring Boot will look for resources by surrounding the view name with a prefix and suffix (externalized to spring.thymeleaf.prefix and spring.thymeleaf.suffix, defaults ‘classpath:/templates/’ and ‘.html’ respectively).
7. Run Application
We are done with our simple web application, it’s time to run our application. Although it is possible to package this service as a traditional WAR file for deployment to an external application server, the simpler approach demonstrated is to create a standalone application. To run our application from IDE, We need to run our web application as a standalone java application.
- With Maven, we can run the application using
mvn spring-boot:runcommand. - we can build the JAR file with mvn clean package command and run jar by using
java -jar target/demo-app-0.1.0.jar.
Now the site is up and running, visit,http://localhost:8080/welcome and if everything is in place, you should have following output on your web browser.
"Hello and Welcome to our Web Application"
8. Summary
In this post, we learned Creating a Web Application with Spring Boot. Spring Boot comes with many builds in feature to create and run web application more quickly and with minimal efforts.
Comments are closed.