In this article of Spring Boot, we will look at Spring Security configuration for Spring Boot application. We will see how the Spring Boot security auto-configuration works and what are the options to disable or customize security features.
Introduction
Spring Boot come with a rich set of auto-configuration features. If we add the Spring security in the classpath, our Spring boot web application are secure by default. Spring Boot relies on Spring Security’s content-negotiation strategy to determine whether to use httpBasic or formLogin. Let’s look at some features and configurations for the Spring Boot security auto-configuration.
1. Set up Spring Security
To enable Spring security auto-configuration for our application, we need to add the security starter in the pom.xml file:
<dependency>
    <groupId>org.springframework.boot</groupId>
    <artifactId>spring-boot-starter-security</artifactId>
</dependency>
Spring use the SecurityAutoConfiguration for default security configuration. Above configuration will setup a default security for your application. Before we move, let’s discuss few important points:
-
- Spring security will create a single user with the user id as
a user. - A random password generated by Spring security and printed at INFO level on application starts.
- Spring security will create a single user with the user id as
You may see a similar output on application startup
Using generated security password: 78fa095d-3f4c-45fr-dfr4-e24c31d5cf35To change this behaviour, Spring security provides some pre-defined properties:
spring.security.user.name = username
spring.security.user.password = password
If we set the username and password using above properties, Spring security will use above configurations:
2. Customize Auto-Configuration
If you like to use your own auto-configuration, you can disable the default SecurityAutoConfiguration configuration by using the exclude property:
@SpringBootApplication(exclude = { SecurityAutoConfiguration.class })
public class SpringSecuritySampleApplication {

    public static void main(String[] args) {
        SpringApplication.run(SpringSecuritySampleApplication.class, args);
    }
}
You also have the option to use spring.autoconfigure.exclude property to disable auto-configuration.
3. Configuring Spring Boot Security
Let’s create a simple web application to understand few important points about the Spring Boot security auto-configuration. We will secure some part of our application while will allow the rest of the application to be accessible by all users.
Welcome Controller
@Controller
public class WelcomeController {

    @GetMapping("/home")
    public String welcome(){
        return "welcome";
    }
}
Login Controller
@Controller
public class LoginController {

    @GetMapping("/login")
    public String login(){
        return "login";
    }
}
Use Controller to display logged in user information.
@Controller
public class UserController {

    @GetMapping("/user")
    public String getUser(){
        return "user";
    }
}
This is a simple application with following details:
- Our Welcome controller will be non secure one. It is accessible by all customer.
- User controller is the secure one. Customer need to provide valid credentials to access this.
- Login controller will display login page for nonauthenticated customer for all secure resources.
In the next section we will have a closer look at the Spring security configuration class:
4. Spring Security Configuration Class
Let’s see how our Spring security configuration class look like:
@Configuration
@EnableWebSecurity
public class SecurityConfig extends WebSecurityConfigurerAdapter {
    @Override
    protected void configure(HttpSecurity http) throws Exception {
        http
                .authorizeRequests()
                .antMatchers( "/home").permitAll()
                .anyRequest().authenticated()
                .and()
                .formLogin()
                .loginPage("/login")
                .permitAll()
                .and()
                .logout()
                .permitAll();
    }

    @Bean
    @Override
    public UserDetailsService userDetailsService() {

        UserDetails user =
                User.withUsername("user")
                        .password(getPasswordEncoder().encode("password"))
                        .roles("USER")
                        .build();

        return new InMemoryUserDetailsManager(user);
    }

    public PasswordEncoder getPasswordEncoder(){
        return PasswordEncoderFactories.createDelegatingPasswordEncoder();
    }
}
Let’s inspect few important points:
antMatchers( "/home").permitAll()– Any request to home page is fully accessible and require no authentication.- All other resources except
/homerequire authentication. - If the user not authenticated, a form based authentication is active using custom login page (
loginPage("/login")) - The
@EnableWebSecurityannotation enable Spring Security’s web security support. - The userDetailsService method setup an in memory user (Not recommended for production deployment).
This completes our initial setup for Spring security with Spring Boot.Let’s run our application to see the workflow in action:
5. Build and Run Application
Let’s build and deploy our application. Once the application is up and running, try to access the secure and unsecure page to see Spring security in action:
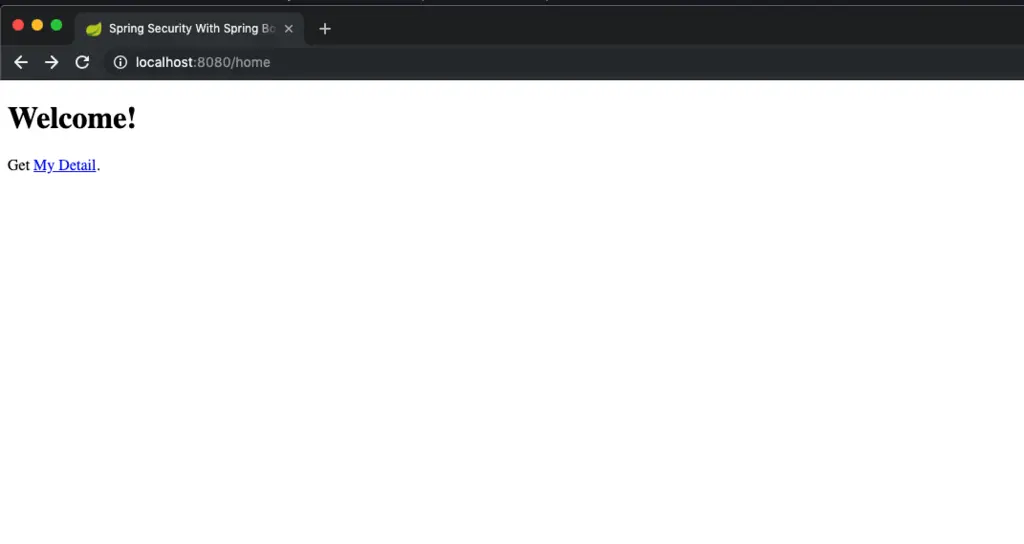
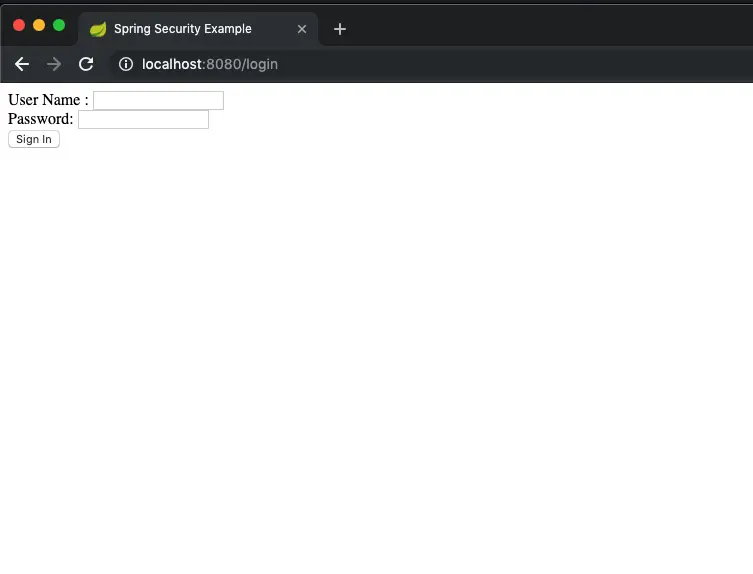
On clicking the “My Detail” section, it will redirect you to login page for authentication:
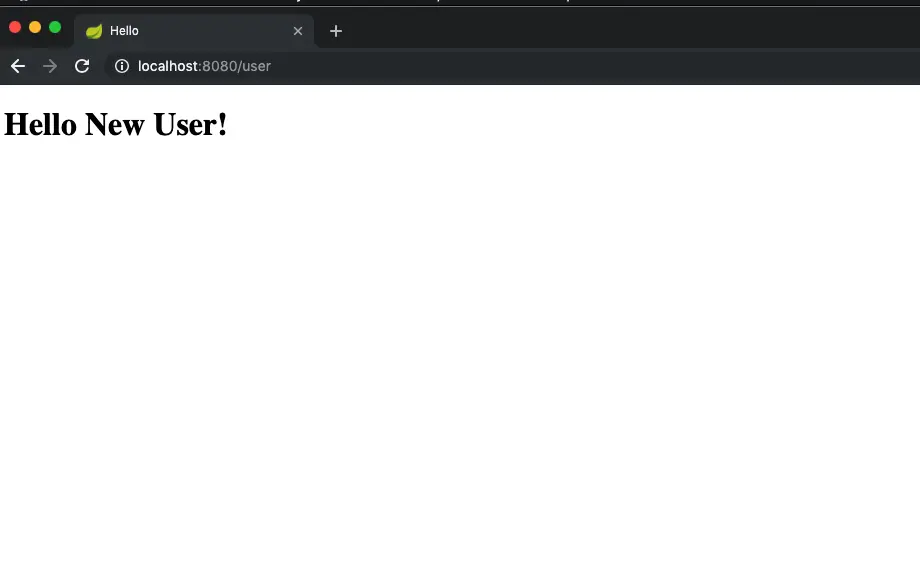
Once you are authenticated, we will get the account detail page (secure one):
Summary
In this post, We saw how the Spring Boot security auto-configuration works. We looked at the different steps to enable Spring security for our Spring Boot application. The source code for this post is available on the GitHub.